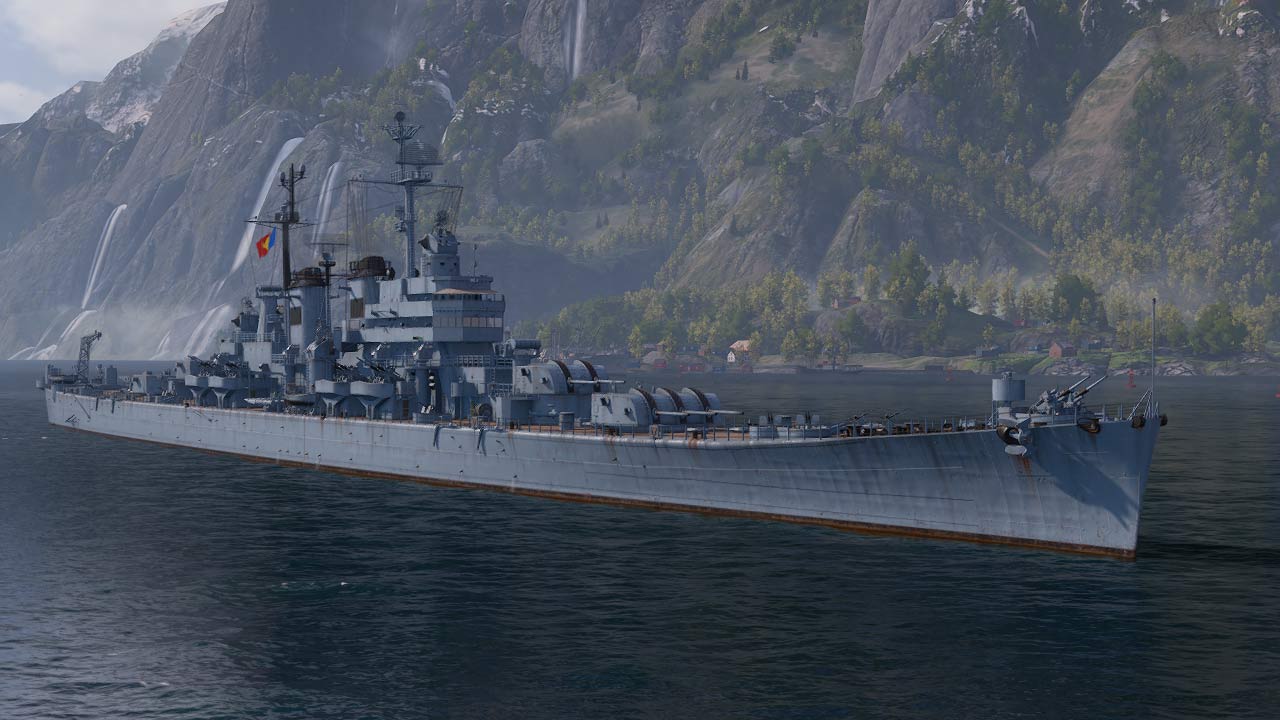
San Martín is a Tier X Pan-American light cruiser and the final ship of the Pan-American cruiser tech line. It represents a completely different take on cruiser gameplay, focusing less on raw damage farming and more on team support, utility, and battlefield control.
Instead of overwhelming enemies with firepower alone, San Martín excels at enabling teammates through powerful consumables and sustained presence.
It’s not a solo carry machine in the traditional sense, but in coordinated play, It can completely shift the outcome of a match.
Basic Details
- Type: Cruiser
- Tier: X
- Nation: Pan-America
- Rarity: Tech Tree
- Release: 7 December 2022
- Price Value: 240,000 XP and 20,000,000 Credits
- Primary Role: Support cruiser with powerful consumables and sustained utility impact
Key Features
- Rapid-Fire Main Guns: Equipped with fast-firing guns that allow consistent damage output over time, especially effective against destroyers and lightly armored targets.
- Combat Instructions Mechanic: A unique Pan-American feature that activates after dealing damage. Once triggered, it enhances her support and makes it significantly more impactful during key moments.
- Enhanced Repair Party: One of its standout tools. When activated (especially during Combat Instructions), it can restore a large amount of HP over time, greatly improving survivability.
- Strong Team Utility: San Martín is built around helping allies, whether through sustained presence, pressure, or survivability boosts via its mechanics.
- Good Concealment and Mobility: It can reposition effectively and stays alive longer despite not having heavy armor.
- Light Armor: Like most light cruisers, it is vulnerable if caught broadside or focused by battleships.
How to Obtain San Martin
San Martín is a researchable Tier X Pan-American cruiser in the tech tree. To unlock it, you must progress through the Pan-American cruiser line and research her from Santander using 240,000 Ship XP.
Once researched, it can be purchased for 20,000,000 Credits. She does not require special resources like Coal or Steel.
Ship Stats
Main Stats
- Survivability: 68
- Artillery – 53
- Torpedoes – 32
- Airstrike – 17
- AA Defense – 85
- Maneuverability – 54
- Concealment – 59
Armor
- Armor: 13-178 mm
Survivability
- Hitpoints: 49,800
- Torpedo Protection: 7%
Artillery
Main Battery
- 2 × 3 152 mm/47 DP Mk.16
- 2 × 2 152 mm/47 DP Mk.16
- Firing range: 15.5 km
- Reload time: 6 s
- 180-degree turn time: 7.2s
- AP Shells: 10x 152 mm AP 130 lb Mk35
- AP Shells Max Damage: 3,400
Consumable Operation Readiness
- Consumable preparation and reload time: -85%
- Action time: 30s
Activation condition: Hit enemy ship with main battery shells to fill the progress bar
- Progress bar fill per hit: +3%
If conditions are not met, you start losing progress
- Time before you lose progress: 15s
- Progress loss per second: 15%
Torpedoes
- 2×5 533 mm Mk14/Mk 17
- Maximum damage: 17,500
- Range: 10.5 km
- Speed: 66 kt
- Reload time: 106s
- Torpedo detectability: 1.3 km
- 180 degree turn time: 7.2 s
Airstrike
- Reload time: 30s
- Available Flights: 2
- Attacking Aircraft: 1
- Aircraft HP: 2000
- Airstrike Range: 8.0 km
- Bombs in Payload: 2x 650-Pound Depth Bomb
- Max Damage: 4,900
- Chance of Fire: 28%
AA Defence
Long Range
- 2×3 152 mm/47 DP Mk.16 in a turret
- 2×2 152 mm/47 DP Mk.16 in a turret
- Action Zone: 3.5-6.9 km
- Hit Probability: 90%
- Damage by Shell Explosions: 1,890
- Continuous Damage: 105
Medium Range
- 9×2 76.2 mm/50 Mk.22 on a Mk.33 mount
- 2×1 76.2 mm/50 Mk.22 on a Mk.34 mount
- Firing Range: 4 km
- Hit Probability: 90%
- Damage: 375
Short Range
- 10×2 20 mm Oerlikon on a Mk.20 mount
- Firing Range: 2 km
- Hit Probability: 85%
- Damage: 123
Maneuverability
- Maximum speed: 34 kt
- Turning circle radius: 790m
- Rudder shift time: 11.4 s
Concealment
- Detectability range by Sea: 11.3 km
- Detectability after firing a main gun shell: 15.5 km
- Detectability after Firing Main Guns in Smoke: 5.5 km
- Detectability when ship is on fire: 13.3 km
- Detectability range by Depths: 0.0-8.5 km
- Detectability Range by Air: 8.5 km
- Detectability when ship is on fire: 10.5 km
Consumables
slot 1: Damage Control Party
- Duration time: 5 s
- Reload time: 60 s
slot 2: Specialized Repair Teams
- Duration: 20 s
- Reload Time: 180 s
- HP: +745
- Charges: 3
slot 3: Short Range Hydroacoustic Search
- Duration: 100 s
- Reload time: 180 s
- Torpedo detectability: 3.0 km
- Ship detectability: 3.0 km
- Submarine Spotting Range at Max Depth: 2.0 km
- Charges: 4
slot 3: Defensive AA Fire
- Duration: 40 s
- Reload time: 180 s
- Charges: 4
slot 4: Surveillance Radar
- Duration: 25 s
- Reload time: 180 s
- Detection of ships: 9.0 km
- Charges: 4
slot 4: Spotting Aircraft
- Duration: 100 s
- Reload time: 240 s
- Firing distance: +20%
- Charges: 4
Tips to Play San Martin
San Martín is all about timing and support. You’re not the frontline damage dealer; you’re the ship that makes your team stronger.
Play at medium range and avoid unnecessary exposure early. Focus on farming consistent damage to activate your Combat Instructions, then use that window to maximize your impact.
Use your Repair Party smartly, especially when enhanced by Combat Instructions. It can keep you alive in situations where other cruisers would be forced to disengage.
Stick near teammates. San Martín becomes significantly more effective when supporting allied ships rather than playing alone.
In late-game scenarios, it becomes extremely powerful. With fewer ships on the map, It’s survivability and sustained damage allow her to control fights and outlast opponents.